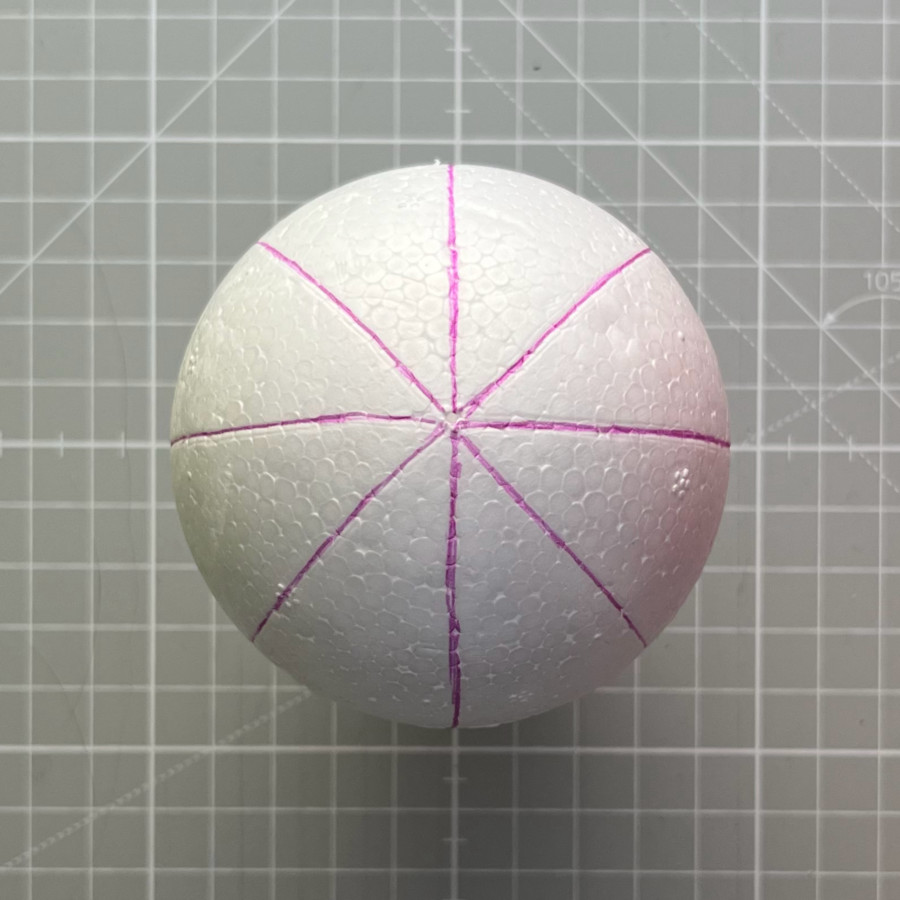
The first step in making a kimekomi ornament is to draw the pattern onto a foam base, followed by cutting, attaching the fabric, and adding finishing touches. Most patterns are geometric patterns with straight lines or circles, but patterns with curved lines are also very popular. The simplest pattern is a stripe pattern with 6 or 8 pieces. This pattern is a great choice for beginners and/or children because it is easy to draw and cut and quick to finish.
helpful landmarks
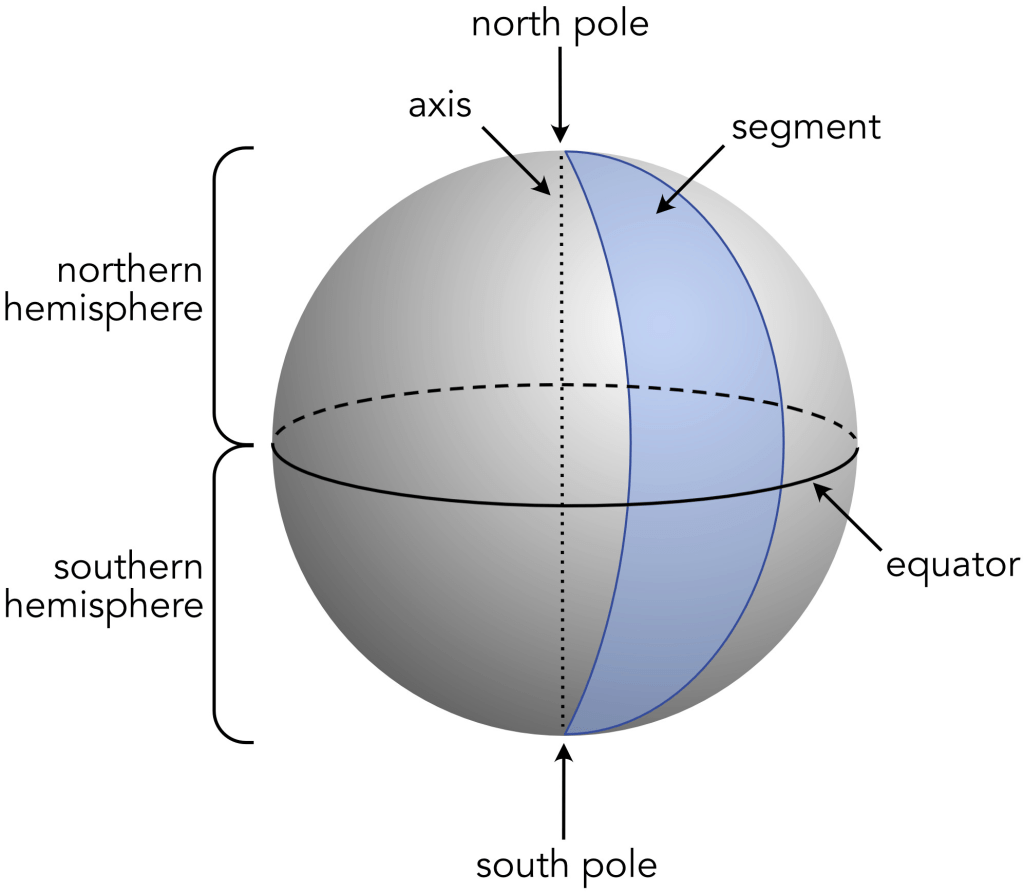
Before you get started, it’s good to know a few key points about your foam base that are commonly used in kimekomi ornament patterns. Since the foam base is typically a ball, the terms used to describe places on the ball are the same as those used for a globe. Luckily, most foam balls have a seam around the middle, like an equator, and concentric lines around the poles. Some foam bases also have marks or stamps at the poles, but they might be a little off – it’s best to look for the concentric lines for accuracy.

tools and materials
Of course you’ll need a foam base to draw your pattern on, and a pen or pencil to draw the pattern with. A soft pencil is a good choice as it produces a faint mark that is usually not visible through the fabric once the ornament is finished. Furthermore, it can be erased in case you need to correct something. On the downside, a pencil does not work well on very soft or very firm foam bases. Personally, I like to use an ultra-thin permanent marker in a light color such as gray or light blue, and only use pencils for labeling when I am working with very light-colored fabrics. To draw straight lines, you can use a tape measure, a cookie cutter, or the SaTurn tool – I’ll tell you more about these options below when I describe how to draw lines.
step 1: dividing into segments
For most patterns, the first step is to divide the foam base into segments. For example, when you are going to draw a pattern of 8 stripes of the same width, you’ll first need to place 8 equally spaced labels on the widest part of your foam base. You have the choice between several tools and methods to do this:
- paper strip
- tape measure (the flexible type that is used in sewing)
- SaTurn labeling tool
A. paper strip
This is a straightforward method to divide a foam base into equal segments. Cut a narrow strip of paper from the long side of a piece of printing paper. Wrap it around your foam base at its widest part and then cut off the overlapping end of the paper strip. It is now as long as the circumference of your foam base. Fold the paper in half and make a crease. Then fold the folded paper strip again and make a crease. Keep the strip folded and fold it in half once more, make a crease and unfold completely. The paper strip is now divided into 8 equal parts. To label segments on your foam base, wrap the paper strip around your ball once more and place a mark at each of the creases plus one where the ends of the paper strip meet.


If you want to draw a pattern that has 6 or 12 segments, you’ll need is to fold the strip into thirds in the first step. After that, fold the folded strip in half once for 6 segments, or twice if you want 12 segments.
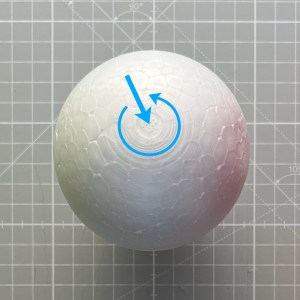
B. tape measure
If you are using a tape measure, I highly recommend using a metric one and performing all measurements and calculations in centimeters. To determine the circumference of your foam base, wrap the tape measure around its widest part and make a note of the measurement. For example, a 3″ (7.6 cm) diameter ball should measure 24 cm. Next, divide the measurement by the number of segments that is required for your pattern, and round the number to the nearest 10th. For an ornament with 8 equal stripes, for example, divide your measurement by 8:
24 : 8 = 3
Chances are that your foam ball does not measure exactly 24 cm around the middle. If, for example, it is only 23.5 cm as in the picture, this is the equation:
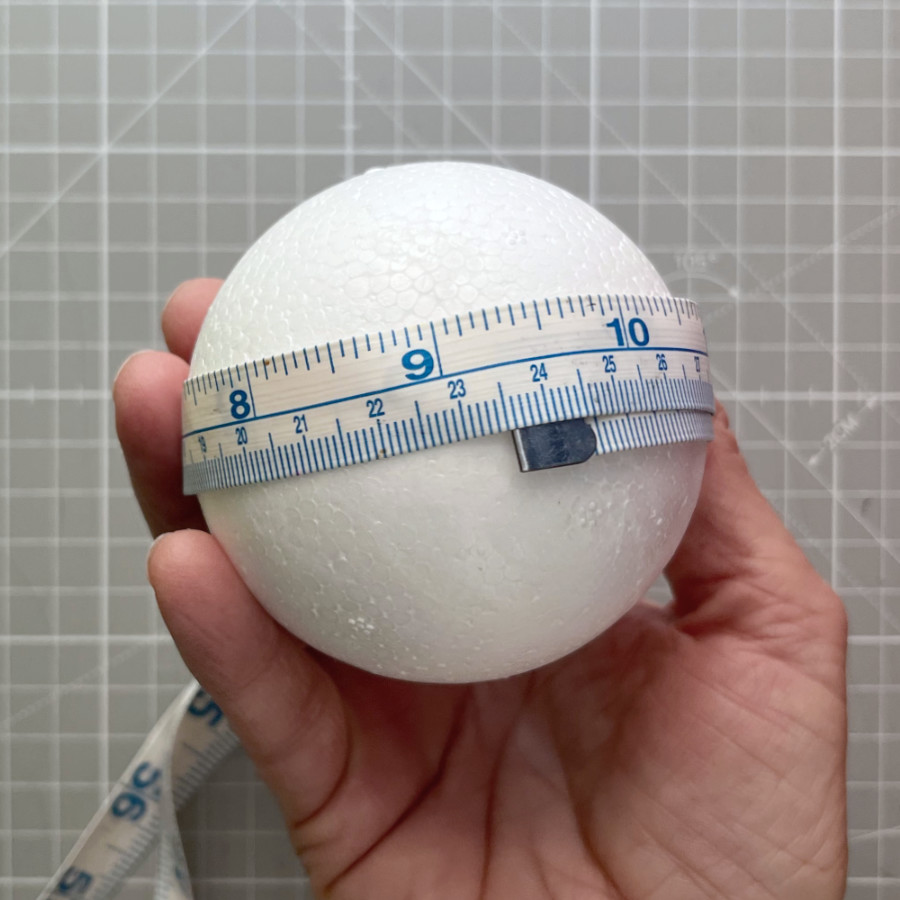
23.5 : 8 = 2.9
The result of your calculation is the segment width, or the space between the labels you are going to draw on the equator: Start by placing one dot anywhere on the equator. Then measure out your segment width as precisely as possible and draw another dot. Repeat in the same manner, always drawing the next dot one segment width from the previous dot, until you have worked your way around the equator. You should now have the number of segments you want. Look at the dots and make sure they look evenly spaced. If the last segment is a little bigger or smaller, it is most likely due to rounding errors – it is the downside of the measuring tape method. If it is only a small deviation, just ignore it. However, if it is a noticeable difference, you may want to move some of the dots a little bit to even out the difference.

C. SaTurn labeling tool
I’ve come up with this awesome tool that makes labeling foam balls a piece of cake. It solves the issues with the tape measure method by using angles for labeling instead of segment widths. The best part is, the angles of the segments only depend on how many segments there are, so it doesn’t matter what the circumference of the foam base is. If you’re tired of the other labeling methods, you should check out my SaTurn labeling tool. Besides dividing the equator into segments, it can also help you draw vertical lines for patterns. If you want to make your own SaTurn, you can get the digital tutorial and printing template here from my Etsy store.
If you are using the SaTurn, first attach the tool to your foam base at the equator. Make sure the ball is centered in the opening of the SaTurn and correct if necessary. Now the only thing you have to do is to draw dots at the marks that you want for your pattern. For our example of 8 segments, place a mark at each of the wider gray arrowheads.

There are shortcut labels for the most common segment numbers so you won’t have to do any math for any of these. If you want to divide your ball into a more exotic number of segments, divide 360 degrees by the number of segments. You can then label your segments according to the scale on the SaTurn tool. If you want to divide a foam base into 10 segments, your segment angle is calculated as follows:
360 degrees : 10 = 36 degrees
Now place labels on your foam ball at multiples of 36 degrees: 36, 72, 108, 144 and so on.
step 2: drawing lines
For a simple stripe pattern, you are now going to draw straight lines from pole to pole. For a pattern of 8 equal segments, that means drawing one lines over each of the 8 equator marks. If you have a steady hand and the foam base is on the smaller side, you can totally draw freehand. But if you want a guide to help you make straight lines, I recommend a cookie cutter. You’ll need a simple round cookie cutter that is slightly larger than your foam ball. Here is how to do it: Push a pin into each pole. Place your cookie cutter around the ball so it touches both pins. Now align the edge of the cookie cutter with one of the equator marks and draw a line from pole to pole. Repeat for every mark on the equator and you’re done!


Other patterns
The pattern I’ve shown here is super easy. You can change it up by adding more or less stripes, and by making them wider or narrower. One of my top picks is a pattern of 4 wider stripes and 4 skinny stripes.
Some patterns such as the kaleidoscope pattern don’t have any stripes at all, because they are entirely made with overlapping circles. Other patterns contain curves or a mix of circles and lines. If you are interested in more complex patterns, check out my digital tutorials on Etsy: I have a swirls pattern tutorial, petals and diamond tutorial, and a pattern collection for eggs (including swirls, petals, diamonds, stripes, kaleidoscope and marble patterns). All my tutorials are designed to guide you step by step in drawing the patterns, and furthermore inspire you to create your own pattern modifications.


