In this post, I’m going share some tips on how to give that extra oomph to your kimekomi ornament. So, you’ve got the fabric on and it’s looking pretty good, but it’s not quite there yet, right? I like to jazz up my ornaments by adding some fancy cord along the grooves. Also, those poles can look a bit messy, so I always pop on a cute little bead cap for that perfect finishing touch. And hey, don’t forget your ornament needs a hanger too!
adding cord
Here’s how to add cord to a simple striped ornament. I am showing a 6-segment swirled egg ornament as example, but the wrapping technique is the same as with a simple striped ornament. You can use metallic cord or satin cord, stretchy or not stretchy, thick or thin. I like to use non-stretchy metallic cord with a 1.2 mm (1/8 inch) thickness.
For an ornament with 8 stripes (that’s the example ornament I used in the drawing and cutting tutorials), you’ll need a length of cord that is at least 4 times as long as your foam ball’s circumference. So just grab the cord, wrap it around your foam ball 4 times, add 5 cm (2 inches) and cut off – or you can simply work directly from the spool (that’s what I usually do).
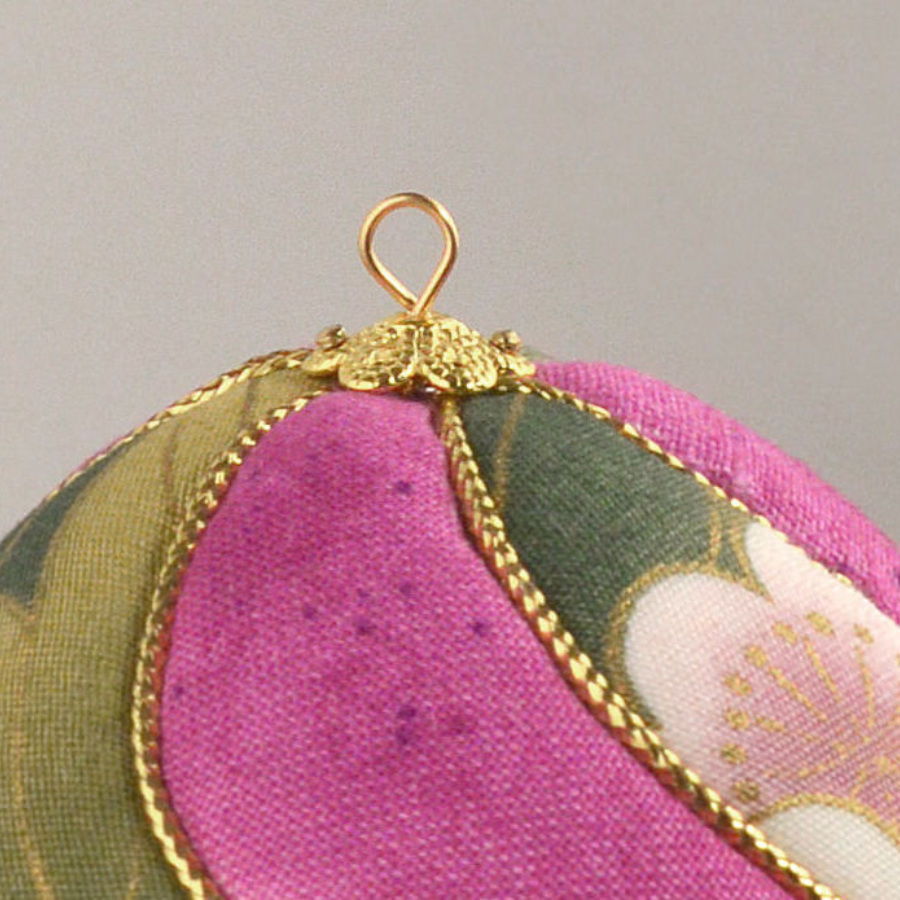
Attach one end of your cord to the north pole. Technically, it does not matter which pole you start with, but you’re going to add the hanger to the pole that you start with, so it’s best to choose the pole that is on top of your ornament. Leave an end of at least 1 cm or 0.5 inch (maybe even more if your cord tends to fray). Tuck the short end into one of the grooves.

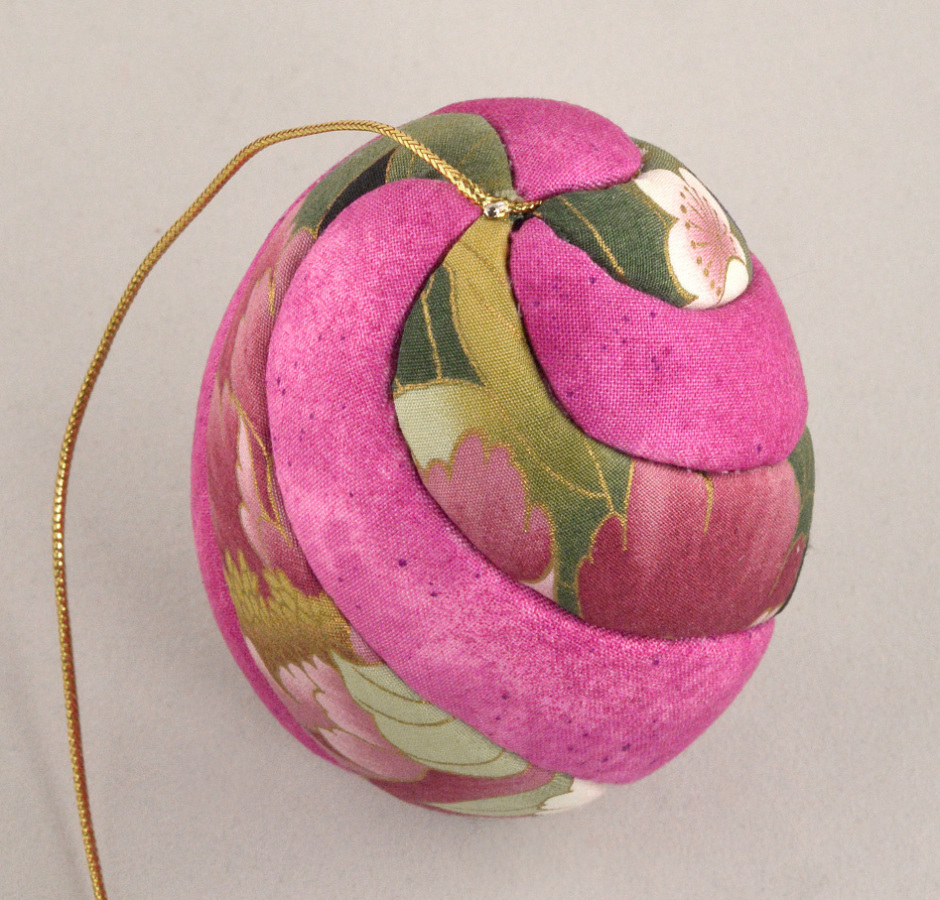
Now pull slightly on the cord and at the same time guide it along one of the grooves. Using your awl or your fingers, gently push the cord into the groove. When you come to the south pole, just keep going straight and guide the cord up again toward the starting point at the north pole. Now take a pin and fasten the cord close to the pole, but don’t cut the cord yet.


Instead, change direction and guide the cord along the next free groove, across the south pole, and up again; fasten again. Continue going around in the same way to cover the remaining grooves, then fasten the end of the cord, cut off leaving an end of 1 cm / 0.5 inch, and tuck it into one of the grooves. Now all the grooves have cord in them.


I know many crafters use glue to attach the cord, but I prefer to do it without glue.
If you want to use glue, I recommend glue stick. Apply it with a toothpick to the grooves, and use it sparingly.
Making a hanging loop
No need to go out and buy fancy stuff for hanging loops for your ornaments. All you need is some craft wire, pliers, and a bamboo skewer. 22 gauge wire is perfect because it’s just the right mix of sturdy and easy to work with. Cut a 5 cm / 2-inch length of wire, bend it in half, and slip it over a skewer. Then take your pliers, grab both wire ends at the same time, and twist them together. You can trim the wire ends to make the loop easier to insert into the ornament.


Attach bead caps and hanging loop
Now all you got to do is attach the bead caps and hanger to the ornament. For the north pole, start by threading your hanger through the hole in the middle of the bead cap. Then, use an awl to make a hole in the ornament where you want the hanger to go, put a drop of glue, and insert the hanger.


I really like those bead caps with little patterned holes because you can stick pins through them for extra secure attachment. To secure the bead cap to the south pole, put a drop of glue on the pole, then push a pin through the larger central hole (you might need pins with larger heads), or if you have those bead caps with extra holes, attach them in the same way as the one on top of the ornament. And there you have it, all done!