I can’t believe it’s that time of year again—wow! It seriously feels like just last month we were still sporting our summer clothes and enjoying all the fun stuff like sandwiches and ice cream at the beach!! And now, out of nowhere, the trees are nearly bare, and it’s time for cozy tea by the fireplace. I’ve been thinking about how I want to deck out my place for the winter holidays coming up. This year, I’m really into nature-inspired decor. I spotted some cute mushroom ornaments the other day, and of course, I couldn’t resist making a few myself! I can’t wait to show you how it’s done!
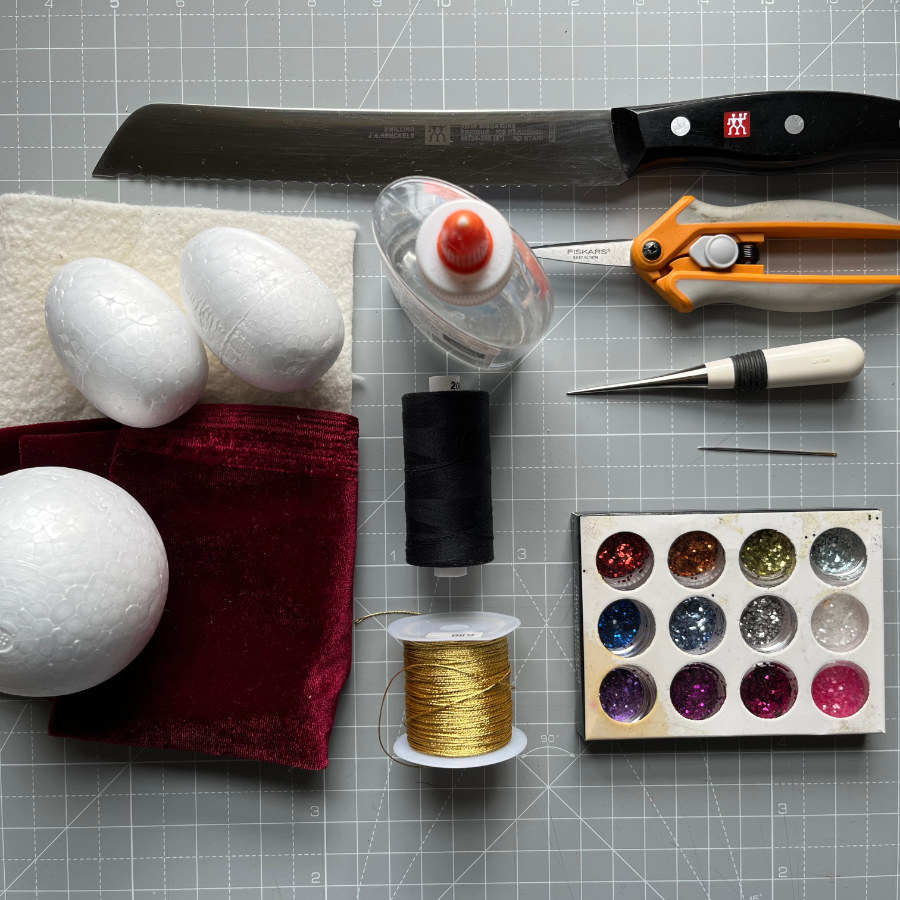
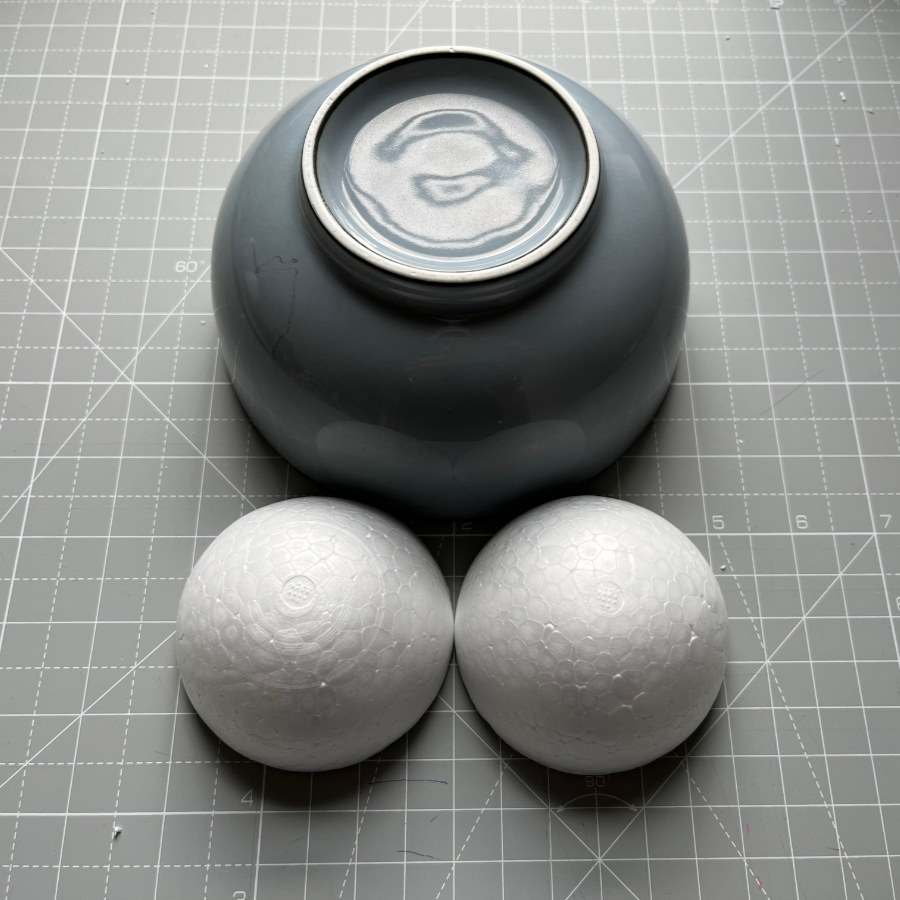
Alright, let’s dive into what you need! To whip up 2 mushrooms, grab 2 polystyrene eggs (about 2.5 inches tall) and one 3-inch polystyrene ball. You’ll also want some white or cream-colored felt or quilt batting, plus a bit of stretch velvet fabric in whatever mushroomy shade you fancy – I went with dark red to match that classic red and gold vibe for Christmas. Don’t forget to get some strong thread, craft glue, tinsel thread for hanging, and a sprinkle of glitter or other fun stuff like pearl or jewel pins, beads, and sequins… Those extras are totally up to you, but trust me, they really make these mushroom ornaments pop! For tools, just a bread knife, scissors, a basting needle, and something to tuck with, like an awl, will do the trick.
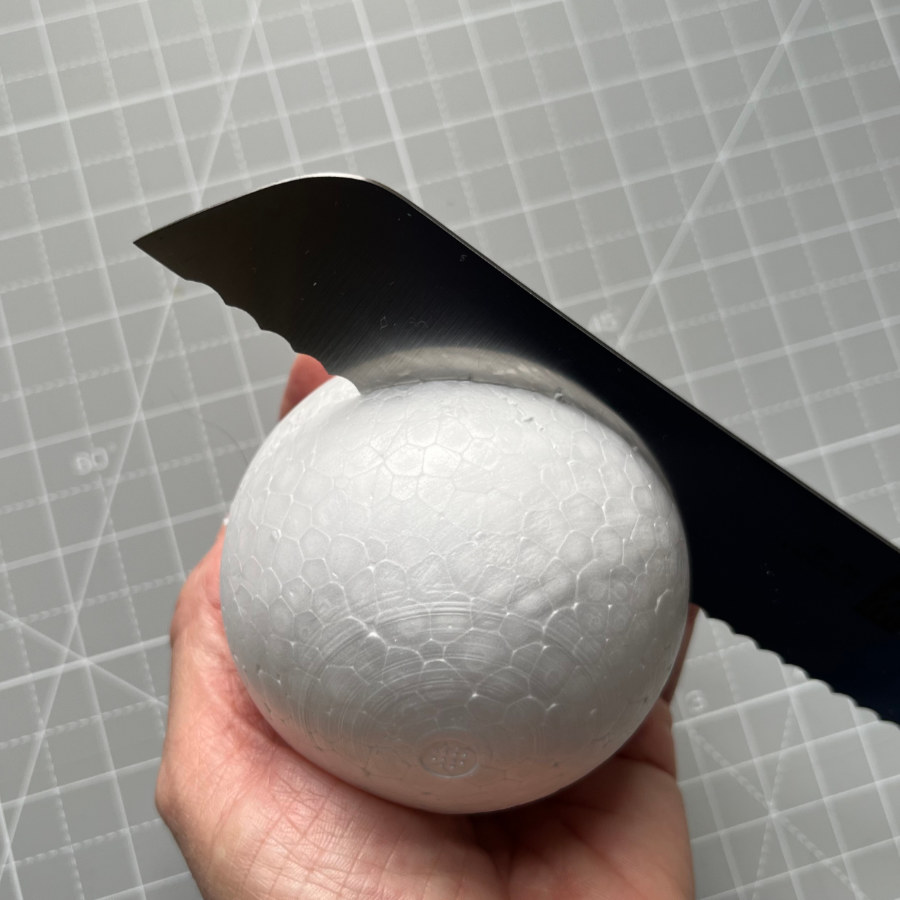
Alright, let’s dive into this! First up, grab that bread knife and cut the foam ball in half. Each half is going to be a mushroom cap. Now, take your scissors and make a small hole right in the center—just a bunch of little snips to create a dent, like you see in the pics. You’ll need that hole later to pop in the mushroom stem.


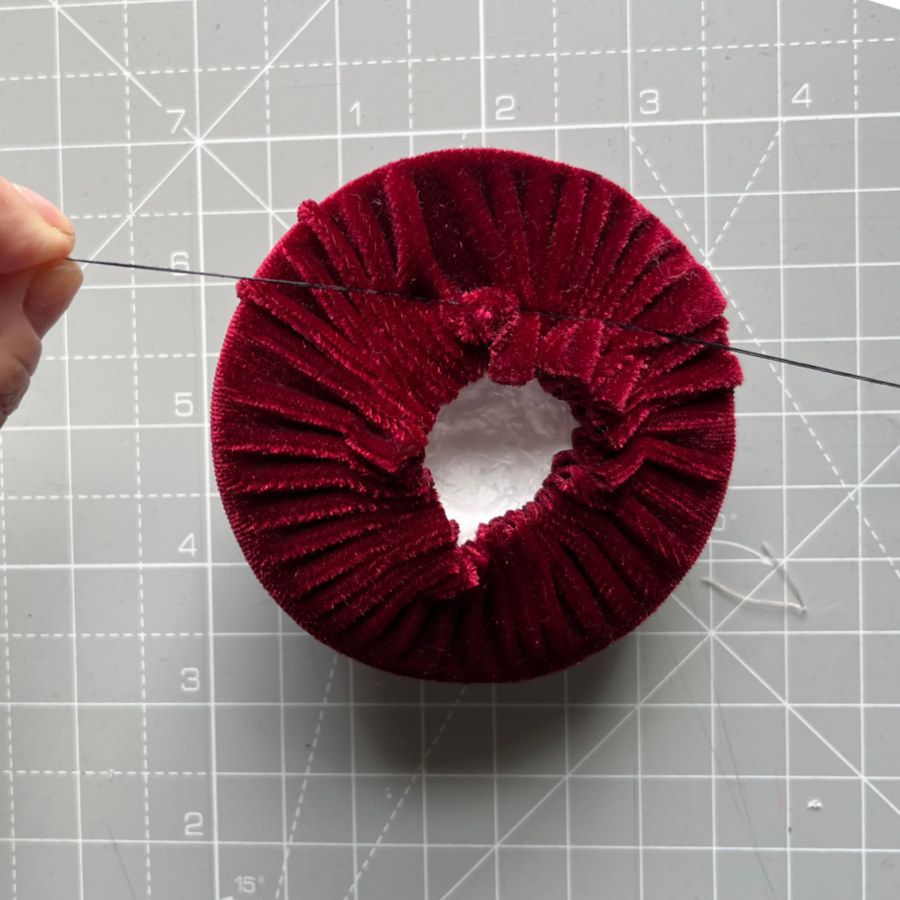
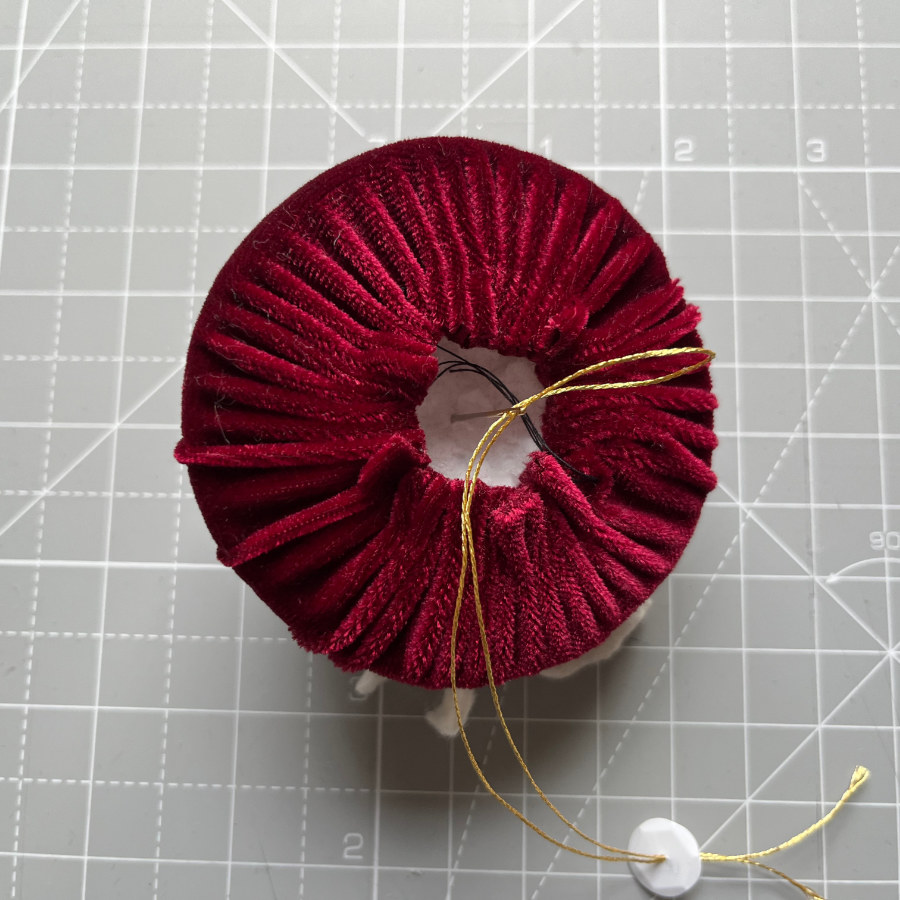
Go through your stuff and find something round that’s about the size of your two ball halves put together. I grabbed a bowl that’s 6 inches wide—just the right size! Set the bowl on your velvet fabric, trace around it, and then cut it out. It doesn’t have to be perfect, so don’t stress! Next, grab some sturdy thread and thread your basting needle with a length that’s as long as your arm. I used regular sewing thread but doubled it up for some extra strength. Baste around the edge of the fabric circle, leaving about 1/4 inch from the edge. I went with about 4 stitches per inch. Don’t bother securing the thread—just let the ends hang loose.


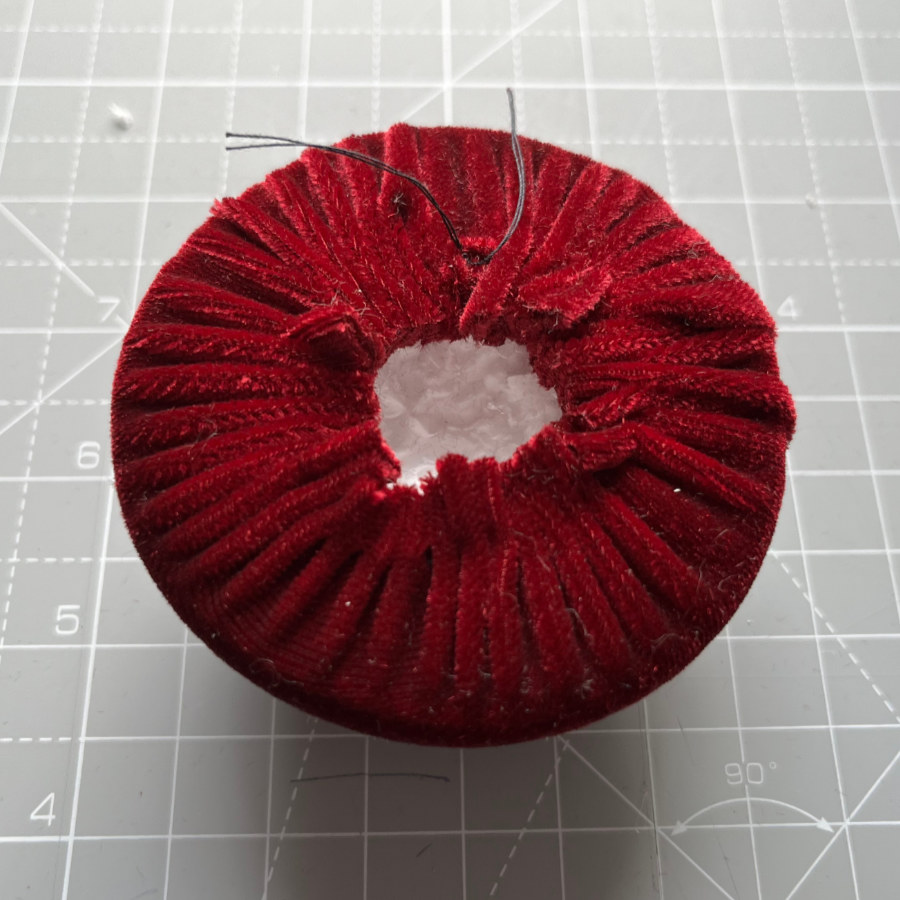
Now for the fun part! Grab your foam ball half and put it onto the wrong side of the fabric circle, flat side facing up, then start pulling on both thread ends. The fabric will wrap around the foam ball half like magic. Keep tugging, and make sure the opening’s right in the center. Once it’s snug and tight, tie it all off with a knot. It might be helpful to get someone to hold the knot while you tie it. Look at that—it already looks like a mushroom cap, with those folds underneath that resemble gills!


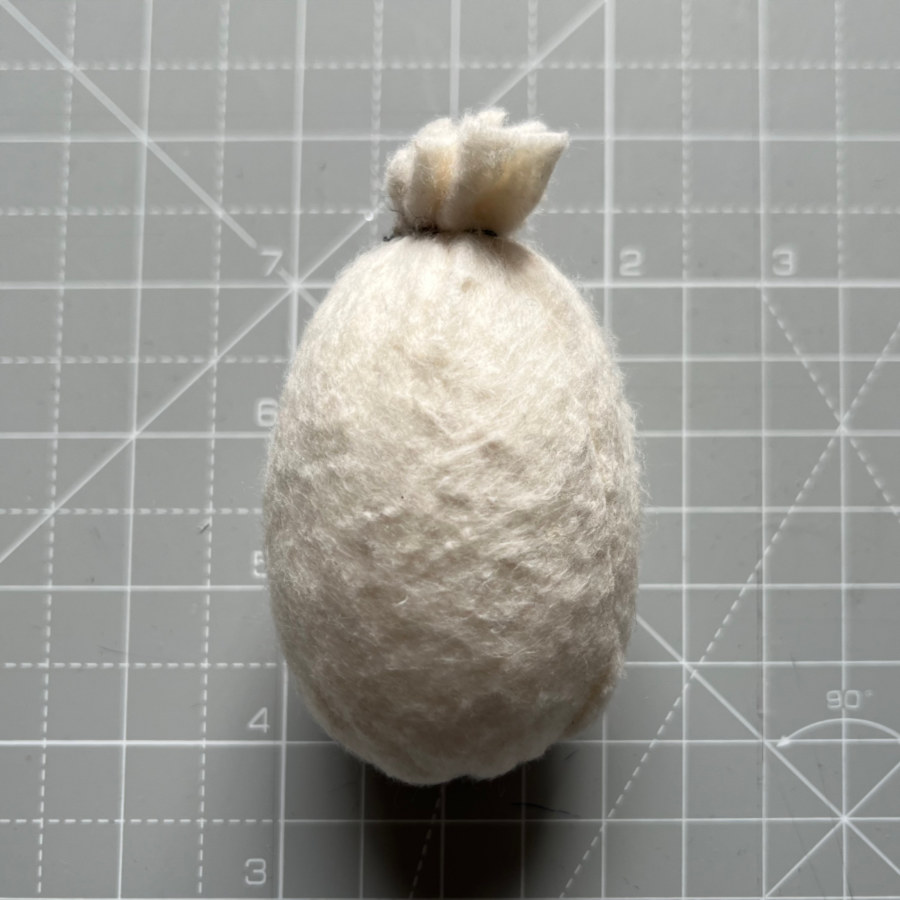
Alright, let’s dive into making that mushroom stem! You’ll need an egg for this bit. Just snip a few times at the bottom of the egg—no need for it to look perfect. Those cuts will help hide the extra batting (or felt) down there. Next, grab a piece of batting that’s a bit taller than your egg. Cut it so the ends just overlap when you wrap it around. Slap some glue on your egg, wrap it up in the batting, and start tucking that extra batting into the grooves you made earlier. If it’s a bit snug, don’t hesitate to trim some extra fabric. Keep tucking until the bottom is all snug and secure. For the top of your mushroom stem, take some thread, gather the batting around the top of your egg, and pull it tight with the thread. Tie it off nice and tight, then give the batting a little trim. Looks like a cute little dumpling, doesn’t it?


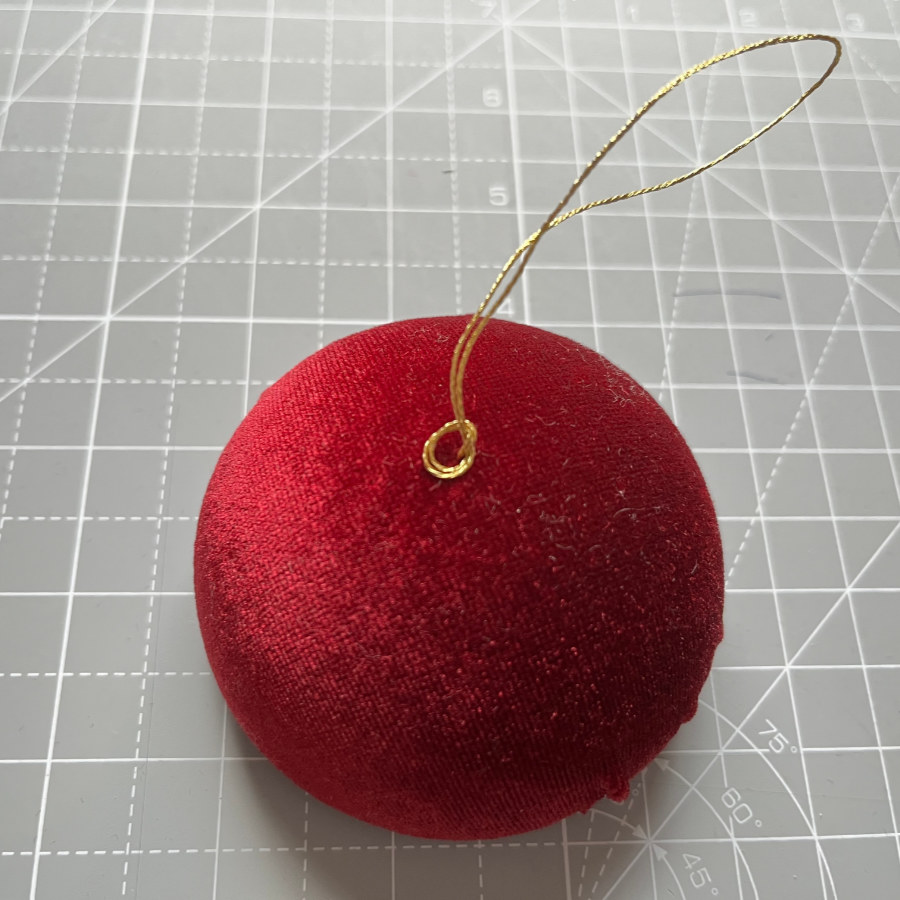
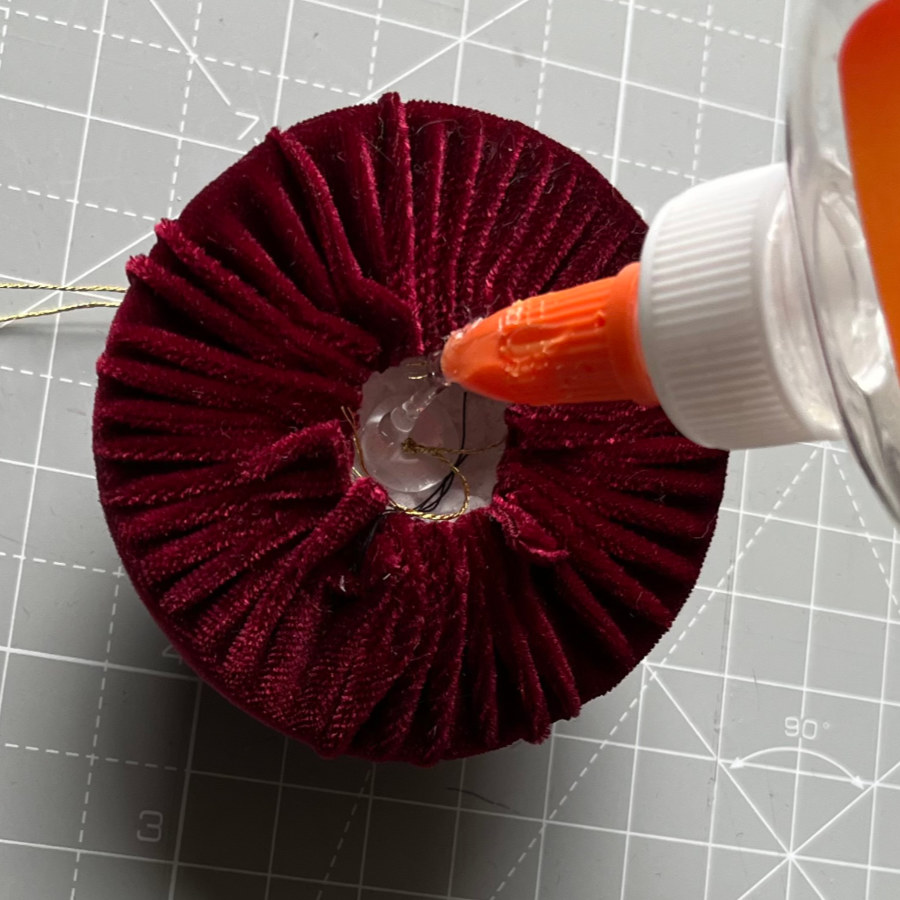
For the hanger, grab a length of tinsel thread and fold it in half. You’ll need a long needle, like a basting needle, so you can get all the way through your mushroom cap. Thread your needle with the doubled-up tinsel (loop first), then just tie a knot at the ends. To make sure the hanger doesn’t slip through your ornament, tie a nice big knot, or you can toss on a bead or sequin to secure it (I went with a sequin). Now poke that needle into the inside of your mushroom and out through the top of the cap. Pull it tight, then tie another knot close to the cap.


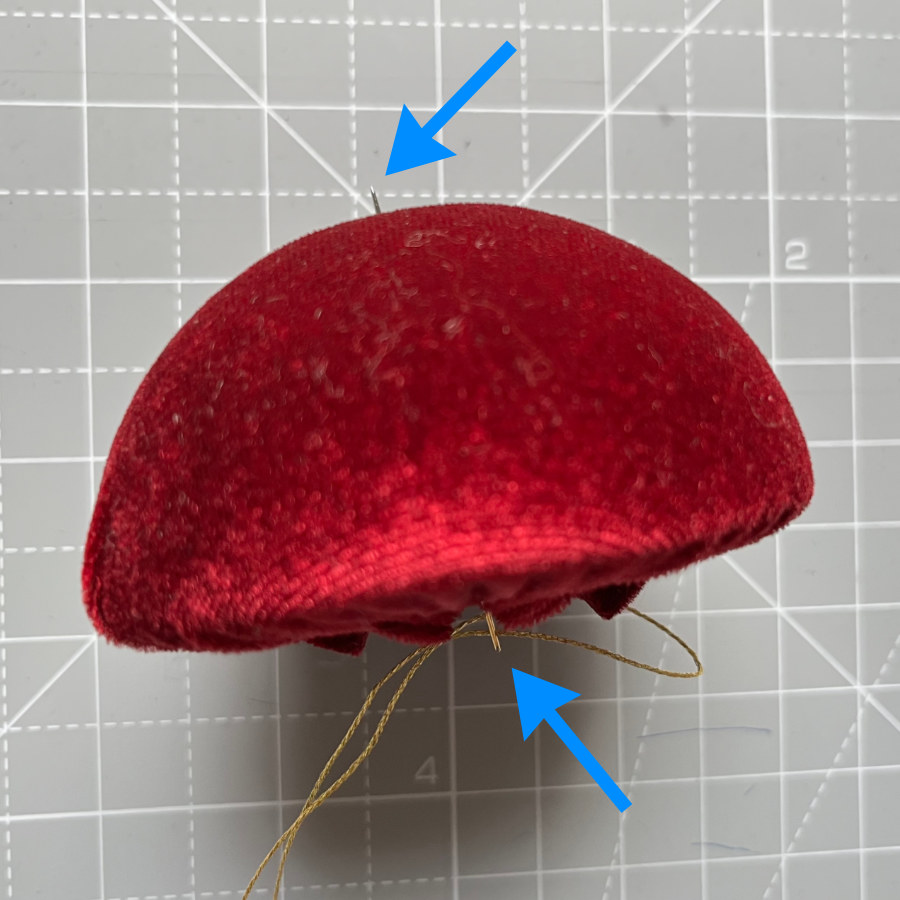

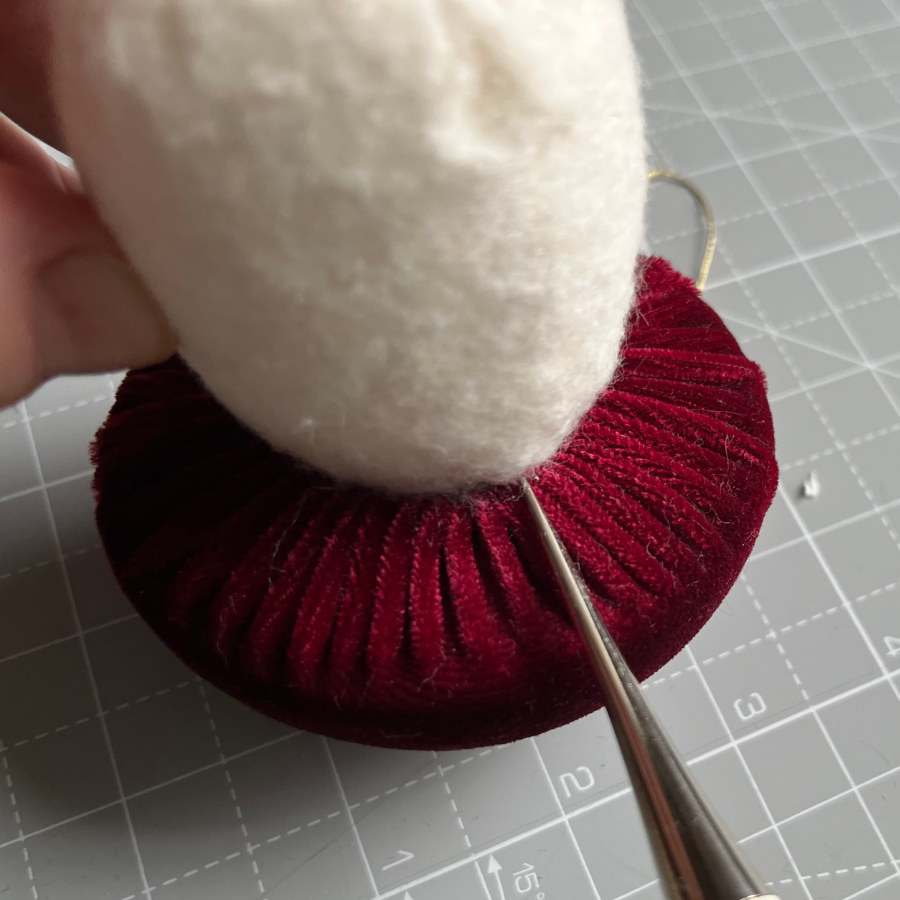
Hey, we’re super close! Slap on a good amount of glue in the hole of your mushroom cap and along the edges of the velvet fabric folds. Then, pop the smaller end of the egg into that hole. Just make sure all the folds and thread ends are tucked away and out of sight. Now let that mushroom dry!

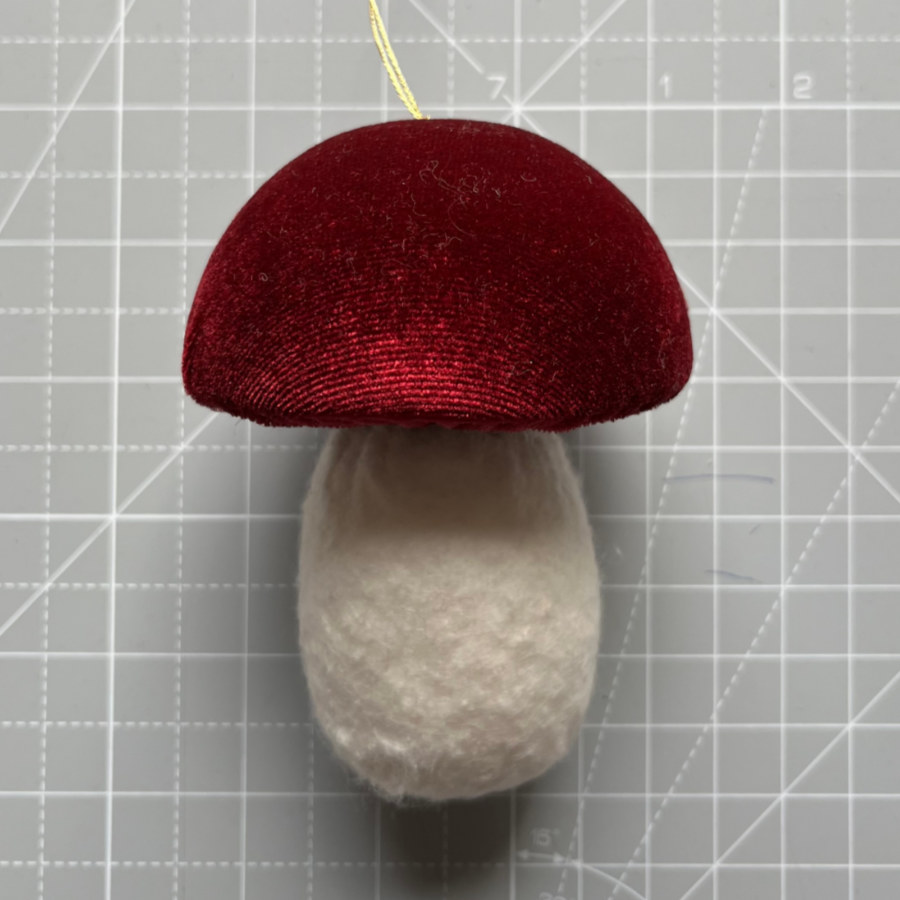
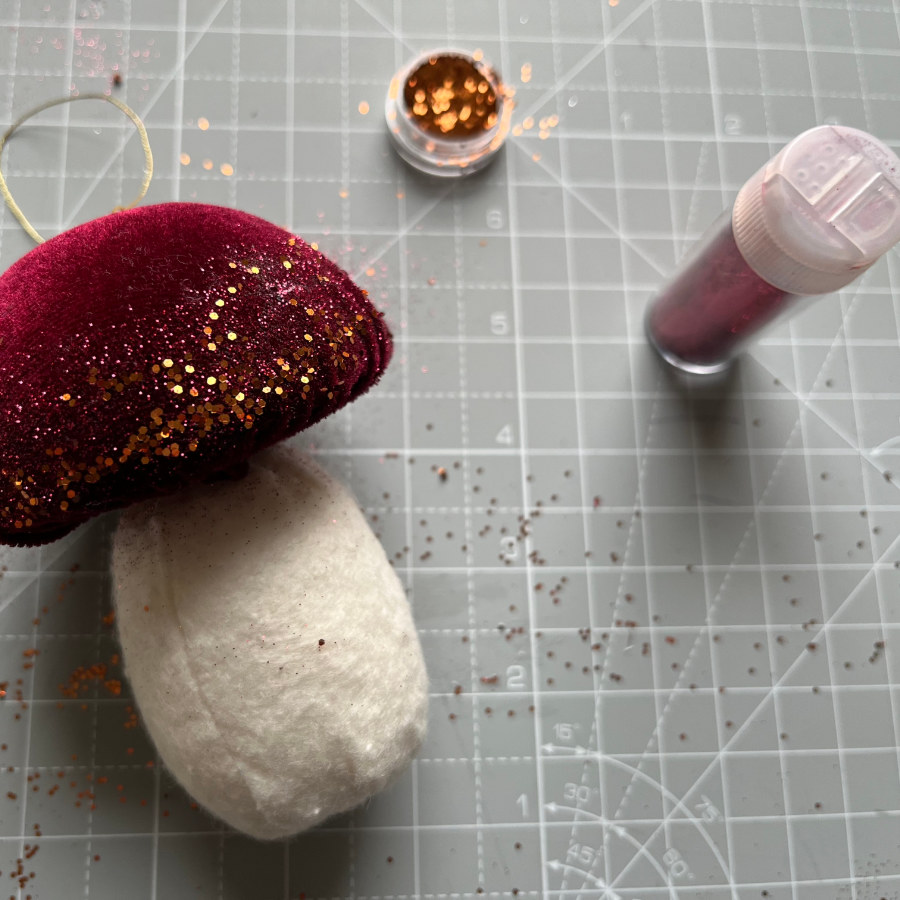
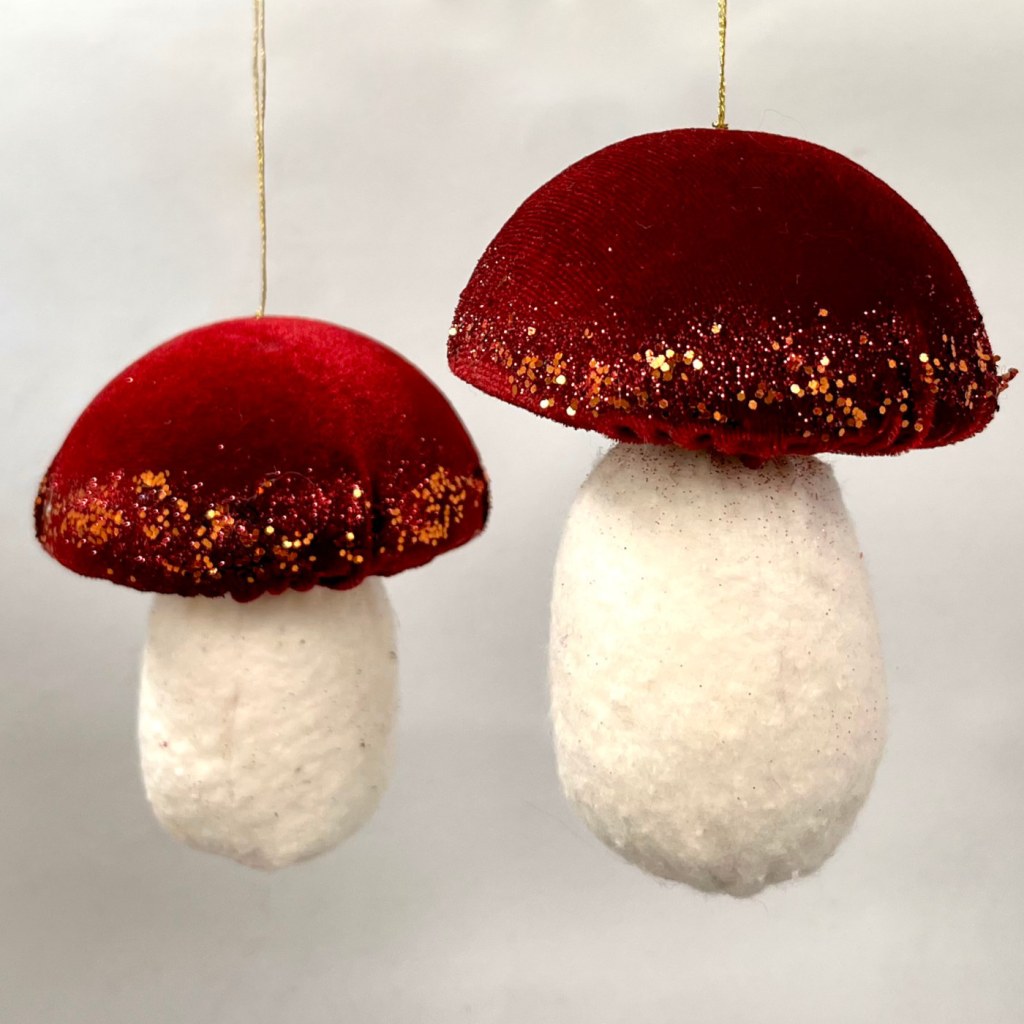
Now comes the fun part: the finishing touch! If you want to use glitter like I did, just put some glue around the bottom of the mushroom cap and sprinkle it with glitter. I went for some big copper-colored glitter and then added a sprinkle of super fine rosy red glitter on top. The fine glitter really did an awesome job of covering up any icky glue marks. And here they are, the finished mushroom ornaments! You can also throw in some glitzy pins or sequins to jazz up your mushrooms. Just let your creativity run wild!